NTE Team Comps
Proven Neverness to Everness team compositions with roles and why they work.
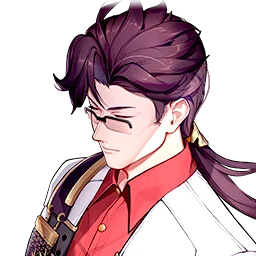



Baicang carries with lifesteal, Adler shields against wipes, Daffodill maintains Scorch uptime — a strong, balanced combo in the current meta.


Burst bossing team: Adler tanks so Nanally/Fadia can dump damage.



Hexed/Scorch team: high Anima+Incantation density, Adler triggers Hexed often plus shields.


Aurelia as main DPS; Daffodill as Break sub-DPS applying Nova, Hathor/Haniel support pushing damage.

Variant with Jiuyuan + Zero as sub-DPS, Hathor as Lakshana support.
'Scorch Domain' (community meta sources): Baicang as main Incantation DPS, Sakiri amplifying buffs/DoT, Daffodill breaking weakness plus Scorch, Haniel supporting/healing (opens the Discord Esper Cycle).
Community meta sources: Adler shields to keep the team alive, Jiuyuan as sub-DPS/CC, Daffodill triggering Scorch for Baicang.

Hathor is nearly mandatory: Delay Warning extends Remora to 12s to maximize the detonation plus +10% CRIT Rate on Remora targets; Zero resets Remora mid-rotation; Haniel keeps HP up/supports single-target.

Charge team: Hathor applies Lakshana for Remora (Cosmos+Lakshana), Jiuyuan adds Anima/Blossom plus burst.
Sub-DPS/Blossom variant built around Chiz's on-field Cosmos damage.
Discord/DoT variant: pairs Psyche/allies to trigger Discord, with Daffodill keeping her Break-wearing role.
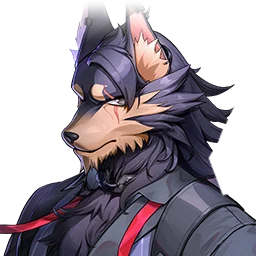

Early F2P team: Edgar keeps everyone alive, Zero as DPS, Skia/Haniel supporting.
Stain team: Hathor carries, Edgar sustains so she can stay on field longer.

Blossom variant team with a healer: Edgar keeps Nanally topped up for long attack chains.
Discord team — Lacrimosa (Chaos) + Fadia (Psyche) push the reaction.
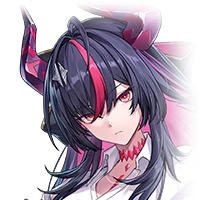
'Crimson Charge' (community meta sources): Hathor + Zero feed Charge for Shinku (new character in v1.2).
'The Gold Standard' (community meta sources): Hathor + Zero + Jiuyuan complete a Cosmos+Anima+Lakshana triple-cycle.
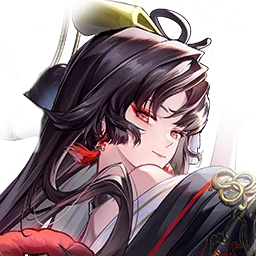
Zero as battery/quickswap, Jiuyuan as sub-DPS/Blossom enabler, Sakiri as buffer/sub; this record-replay team benefits from a strong chain of ally Skills.
Premier Nanally team: Hotori replaces Sakiri in the last slot, recording and replaying ally Skills to stack burst.

Shinku hypercarry core: Iroi keeps the team alive plus buffs ATK, Hathor handles Remora, Chiz/Zero as Cosmos sub-DPS.
Blossom reaction team: Iroi enables the reaction plus survives well.
Flexible — Iroi pairs with almost any strong main DPS.
Mint as main DPS; Zero triggering the Blossom Esper Cycle, Sakiri supporting plus applying Hexed for Mint's damage burst, Haniel buffing ATK.
Variant with Daffodill as a reaction-enabling sub-DPS; Haniel/Zero providing buffs and energy.
Standard Blossom team: Jiuyuan/Haniel providing energy plus buffs, Adler shielding; Nanally carrying Anima DPS.
Variant with Sakiri supporting ATK/reactions, Adler tanking.
'Blossom Standard' (community meta sources): Sakiri triggers the Hexed reaction plus buffs.
The strongest overall team: Hathor extends Remora to 12s plus 10% CRIT Rate, Iroi healing plus buffing ATK, Jiuyuan as sub-DPS/Blossom.
Charge team: Nanally fires 10 Vida Pistol shots/1s matching Shinku's 1s Charge Enhancement cooldown, stacking ATK almost instantly (community meta sources).
Rule One: Build Around a Reaction Lane, Not Raw Power
The 6 Esper elements sit on a wheel, and only elements next to each other on that wheel trigger a Duo reaction when paired. Chain two Duo reactions from the same side of the wheel and they escalate into a Trio, which hits noticeably harder.
- Pick a Duo or Trio first, then fill the team with characters whose elements match that lane — this beats picking your four strongest characters and hoping their elements happen to line up.
- A team that keeps one lane intact usually deals more sustained damage than a team of four powerful characters spread across unrelated elements, because reaction damage compounds on top of normal attacks instead of just adding to them.
- The fourth slot is where most teams flex — reserve it to solve a specific problem (survivability, energy refill, crowd control) rather than filling it with whichever high-tier character is left over.
Rule Two: Arc Class Shapes Gear, Not Team Slots
Every character belongs to one of five Arc-compatibility classes (labeled ONE through FIVE), which only decides which Arc weapons they can equip.
- Nothing about team building checks this class — a lane built around three different elements routinely mixes three or four different classes with zero restriction.
- Where class actually matters is gearing day: once a team is set by element and role, go check each member's class separately to know which Arc pool to pull or craft from.
- Don't let a class mismatch talk you out of an otherwise perfect reaction lane — it only affects which weapon shelf you shop from, never who's allowed to stand next to whom.
Rule Three: Cover Four Roles Before Chasing a Second Lane
A four-person team still needs someone dealing damage, someone sustaining that damage, and someone keeping the team alive, on top of whatever reaction lane it's built around.
- Main DPS anchors the team and decides which lane the other three build around.
- Sub-DPS adds a second damage source, often the character whose element completes the Duo or Trio with the Main DPS.
- Support buffs damage, extends reaction uptime, or refills the resource the Main DPS needs to keep attacking.
- Healer (or a Support that doubles as one) keeps the team alive in longer fights — skip this only if the content is short enough that survival was never in question.
Only once these four slots are covered by characters that also share a workable element lane does it make sense to reach for a second, more advanced reaction — trying to run two lanes with four characters usually means neither lane is complete.
Reaction Names Aren't Random: 9 Total, and Two of Them Double as Gear Bonuses
The Esper Wheel produces a fixed set of reactions, not an open-ended list — knowing the count helps you recognize one when a skill description names it.
- There are 9 named reactions total: 6 Duo reactions from adjacent-element pairs, 2 Trio reactions from chaining two Duos on the same side of the wheel, plus the Blossom mechanic's own Vita Bud/Pistil interaction, which runs on separate rules from the other 8.
- Nova and Scorch are two of those Duo reaction names — and they're not purely a team-building concept. Certain Module suits (gear sets) key their own set bonus directly to participating in a Nova or Scorch reaction, meaning a well-built reaction lane and a well-chosen gear suit can reinforce the exact same trigger instead of being two unrelated decisions.
- Practical takeaway: when picking gear for a team already built around a specific Duo or Trio lane, check whether any available suit's bonus explicitly names that same reaction — that's a stronger pick than a suit chosen purely for raw stats.
A Five-Step Checklist for Building Your First Real Team
Put Rules One through Three together into an order you can actually follow, rather than juggling all three at once.
- Step 1: Look at your strongest character and note their element — this becomes the anchor for whichever lane you build.
- Step 2: Find one adjacent-wheel element among your other characters to complete a Duo; a Trio (chaining a second Duo from the same side) can wait until later.
- Step 3: Assign Main DPS to whichever of those two hits hardest, and Sub-DPS to the other — this pair is now your reaction lane, locked in.
- Step 4: Fill the third slot with a Support that extends the lane (buffs damage, refills energy, or keeps the reaction active longer), picked without regard to Arc class.
- Step 5: Fill the fourth slot with a Healer, unless the specific content you're clearing is short enough that survival was never a real risk — in that case a second damage-focused Support is fine instead.
Only after this four-slot team is running smoothly is it worth reaching for a second lane or a Trio upgrade — treat that as a refinement, not a prerequisite to starting.
 Tier List→
 Redeem codes→